Lawn Care Forum banner

Chapin 97902 24V Push Sprayer

2 reading
411K views 1K replies 154 participants last post by  FairviewTxAg  
#1 ·
Update: Looks like they have changed the model number from 97900 to 97902.

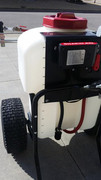
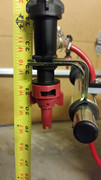
I ran across something I had not see before while doing some research for another thread... the Chapin 97902 24V Push Sprayer. I'm having a hard time finding someone who has it in stock, but it looks like it is priced around $300.

It looks like it has some great specs:

- Uses a 24V Li-ion battery for up to 1.75 hours of continuous spraying
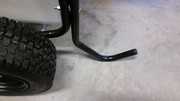
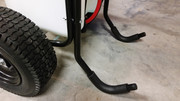
- Has a single nozzle boom arm that can be positioned left, center or right
- Has both boom and spot spraying functionality
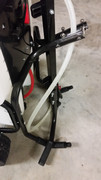
- Has a 12 gallon tank capacity with what looks to be a relatively low center of gravity
- The 40psi operating pressure falls neatly on nozzle performance charts

For anyone considering an Earthway push sprayer, I would probably look into the price/availability of these. It seems to solve many of the complaints I had with the S15, while maintaining an attractive price point.

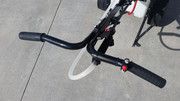
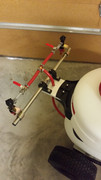
For a BOM on how to do edits/improvements to this system look at this post.
 
#327 ·
SGrabs33 said:
I charged my battery the other day for use this weekend. Is it bad for the pump to run without any fluid? I'd like to test it to know if it's not working. I guess I could throw some water in it also. Thinking out loud here.
I do believe it's not good to run the pump for too long without any water as I believe it helps to cool it down. If you are just testing to see if it comes on or not, I can't see that doing any damage.
 
#328 ·
Mightyquinn said:
SGrabs33 said:
I charged my battery the other day for use this weekend. Is it bad for the pump to run without any fluid? I'd like to test it to know if it's not working. I guess I could throw some water in it also. Thinking out loud here.
I do believe it's not good to run the pump for too long without any water as I believe it helps to cool it down. If you are just testing to see if it comes on or not, I can't see that doing any damage.
Thanks :thumbup:
 
#329 ·
Colonel K0rn said:
If it were me, I'd take it to the closest Lowe's and recycle ♻ it. Last thing you want is a lithium battery 🔥.
Battery is fixed. Removed tester and charged pack in a lipo bag. Didn't over heat and works fine. Deal with a lot of 6 cell lipos in RC racing and helicopters. I believe I damaged the tester when I tried to jump the pack off from being discharged.
 
#330 ·
I finally got the sprayer nozzle components to finish my push sprayer today. Thanks to everyone who posted their modifications in the past. I used those ideas.

I mistakenly ordered a 3/4" stainless steel tube (Used a rubber shim to rectify). The only tool really used was a drill press. I had an extra red 5/8" hose from a heater core flush on my Jeep. I used cutoff valves because I have some narrow spots in the yard.

I didn't want to modify the original hose or boom in case I need to return it for warranty issues later on...


#331 ·
TulsaFan said:
I finally got the sprayer nozzle components to finish my push sprayer today. Thanks to everyone who posted their modifications in the past. I used those ideas.

I mistakenly ordered a 3/4" stainless steel tube (Used a rubber shim to rectify). The only tool really used was a drill press. I had an extra red 5/8" hose from a heater core flush on my Jeep. I used cutoff valves because I have some narrow spots in the yard.

I didn't want to modify the original hose or boom in case I need to return it for warranty issues later on...


Looks really good!!
 
#335 ·
TulsaFan said:
I finally got the sprayer nozzle components to finish my push sprayer today. Thanks to everyone who posted their modifications in the past. I used those ideas.

I mistakenly ordered a 3/4" stainless steel tube (Used a rubber shim to rectify). The only tool really used was a drill press. I had an extra red 5/8" hose from a heater core flush on my Jeep. I used cutoff valves because I have some narrow spots in the yard.

I didn't want to modify the original hose or boom in case I need to return it for warranty issues later on...


I'm with @SGrabs33 on this. We're going to need a BOM, or a way to order this setup :D I think it would be perfect for what I need.
 
#336 ·
Parts List: (Most of these parts ideas came from other members who purchased and assembled their booms before I even purchased my Chapin.)

(2) Diaphragm Check Valve Nozzle Bodies (They have a single 3/8" hose shank): 22251-311-375-NYB
(2) Nozzles for contact products: TeeJet XRC11004VS
(2) Nozzles for systemic products: TeeJet AIC11004VS
Strainers: TeeJet 8079-PP-50
(2) TeeJet Clamps: QJ111HP34 (This clamp is for 1" O.D. tubing. It provides more height for your sprayer tip. Also, it took longer to get this part than anything else.)
(1) 3/4" Stainless Steel Tube 24" (You may want a 1" O.D. tube? Otherwise you can use the left over rubber spacers from the clamp mounting kit)
(1) Barb Ball Valves (2 pack)
(1) Clamp Mounting Kit (mini pair) Very cool item that allows your to use 3/4", 1", or 1.25" tubing.
(1) Aluminum Plate (2 pack in case want to help out a TLFer)
(1) (You need 9) Box of (10) Stainless steel clamps
(1) 3/8" Brass barbed tee
(1) Red hose 3/8" I.D. with 5/8" O.D.
1' of Clear hose
(1) Hillman 2-Pack Small-in Black Plastic Caps
(2) Stainless Hillman 1/4-20 x 2-in Socket-Cap Anchor Bolt (This barely works...A 2.25" or 2.5" would have worked better)
(2) 1/4 in.-20 tpi x 1-1/2 in. Stainless-Steel Socket Cap Screw
(2) Packs (You need 4 total) Total 1/4 in.-20 tpi Coarse Stainless-Steel Nylon Lock Nut (3/Pack)
(1) (You need (4) total) 1/4 in. Stainless-Steel Flat Washer (6-Pack)
Also, (1) Hillman 5 Count 6mm to 1 x 40 mm Pan-Head Zinc-Plated Phillips-Drive Metric Machine Screw The black boom holder that attached to my tank had (2) 45mm screws and was very loose.

Dead man's switch addition:
(1) Start Switch
(1) Stainless Steel U Bolt
(1) Package Spade Terminals I used (2) of the blue ones and filed them down so they would be 3/16". Therefore, I would not have to modify the original cable. I just unplugged from the original switch and hooked up my new switch. The sprayer will only work when the red button is pushed in.
(2) Black zip ties

Tools: $70 drill press with 5/8" & 5/16" bits, PVC cutters to cut the hoses, flat file to file down the 1/4" male spade connectors.

Total cost for boom: Approximately $174 before taxes which is much more than others paid for their original Chapins. :shock: (A variation of the boom could be built a lot cheaper without stainless steel parts or a different mount)

My 97900 was purchased late in the 2017 season from Northern Tools for $200. So, $374 isn't too bad for something that I enjoyed assembling and should use for several years to come. (FWIW...I don't have a Lesco spreader. So, a spreader-mate was not even an option or consideration.)

I hope this info helps!!!
 
#339 ·
TulsaFan said:
I finally got the sprayer nozzle components to finish my push sprayer today. Thanks to everyone who posted their modifications in the past. I used those ideas.

I mistakenly ordered a 3/4" stainless steel tube (Used a rubber shim to rectify). The only tool really used was a drill press. I had an extra red 5/8" hose from a heater core flush on my Jeep. I used cutoff valves because I have some narrow spots in the yard.

I didn't want to modify the original hose or boom in case I need to return it for warranty issues later on...


That looks really good.

Did the sqft of your yard impact your design? I went with more, lower flow nozzles, cause I was concerned I'd run out of water before covering the entire area.

Also, any concern about spraying right into the tire tracks? I was unsure if that would impact the resulting application of a foliar product.

Lastly, I do like that your boom is less wide. I've run into some challenges with chainlink fence on occasion and some other tight spots that require a bit of creative maneuvering for a 5' boom.
 
#341 ·
Movingshrub said:
Did the sqft of your yard impact your design? I went with more, lower flow nozzles, cause I was concerned I'd run out of water before covering the entire area.

Also, any concern about spraying right into the tire tracks? I was unsure if that would impact the resulting application of a foliar product.

Lastly, I do like that your boom is less wide. I've run into some challenges with chainlink fence on occasion and some other tight spots that require a bit of creative maneuvering for a 5' boom.
I have a gate and my yard is tiny. I will never run out of battery or 12 gallons.

I will defer final judgement to Ware on all questions...I copied his design without any fabrication tools other than a small drill press. Added a few more clamps so I could have more leak issues. :lol:

(Lastly...If I was to do it again, I would use a 0.5" x 3" x 8" piece of aluminum for the mount. This would allow me to place my mounts closer to the tank on the outside of the black plastic. The farther the boom sticks out, the more height you lose when you tilt it for use.)
 
#344 ·
SGrabs33 said:
@TulsaFan Have you done a check to see how many gallons of product are needed for your 3k lawn. I have 4.5k and want to make sure I pick the right nozzles to use 10ish gallons for the whole yard. It currently takes about 6.5-7 gallons using the stock set up.
No bucket test as of yet. Too busy building a DYI PVC Garbage Bag Holder so that I can find another hiding spot from the wife. :D

As someone suggested...I first zip tied a thin landscape brick to the intake hose to keep it flat on the bottom of the tank. I added one gallon marks on the back of the tank. Then, I added blue marker dye and sprayed the entire yard with the tank holding 12 gallons. (The moles have decimated my yard and the pushing was not as easy as I thought it would be.) I used about 3.1 gallons. (The 3K is an estimate and my yard might be a little smaller.)

Lessons learned: Do NOT handle any blue marking agent without latex gloves unless you a really big fans of the Smurfs. Stro3579 was not kidding when he suggested a dead man's switch for the handle bars. For a small yard with many obstacles and starts/stops, it is necessary. I ordered one last night.


#346 ·
TulsaFan said:
SGrabs33 said:
@TulsaFan Have you done a check to see how many gallons of product are needed for your 3k lawn. I have 4.5k and want to make sure I pick the right nozzles to use 10ish gallons for the whole yard. It currently takes about 6.5-7 gallons using the stock set up.
No bucket test as of yet. Too busy building a DYI PVC Garbage Bag Holder so that I can find another hiding spot from the wife. :D

As someone suggested...I first zip tied a thin landscape brick to the intake hose to keep it flat on the bottom of the tank. I added one gallon marks on the back of the tank. Then, I added blue marker dye and sprayed the entire yard with the tank holding 12 gallons. (The moles have decimated my yard and the pushing was not as easy as I thought it would be.) I used about 3.1 gallons. (The 3K is an estimate and my yard might be a little smaller.)

Lessons learned: Do NOT handle any blue marking agent without latex gloves unless you a really big fans of the Smurfs. Stro3579 was not kidding when he suggested a kill switch for the handle bars. For a small yard with many obstacles and starts/stops, it is necessary. I ordered one last night.
yea....the switch is a must
 
#347 ·
CH3NO2 said:
Nice work. Have you done a bucket test to see what volume it puts out with the 2 nozzles? Would be curious to know.
I ran two, quick tests. One minute each for the time:

The first test had 52 oz in the left bucket and 51 oz in the right bucket.
The second test had 51 oz in the left bucket and 49 oz in the right bucket.

The average is 50.5 oz. per nozzle or 0.39 GPM.
Combined the boom sprays 101 oz. or 0.79 GPM.
 
#349 ·
TulsaFan said:
It took me looking at this picture to realize that even though I followed the directions for assembly, I always had the spray wand covering the power switch, and it would inadvertently turn it off while I was pushing it. Now I'm going to reorient the clips for the wand tomorrow :lol: I always clipped it into the cap on the tank because of that.

Another thing is that if you get the tracking dye on the rubber gloves, you can still get it on your fingers when you're taking them off. Ask me how I know.
 
#350 ·
@Colonel K0rn Yeah, that wand has only gotten in my way. I have only used it for testing purposes so I may see if I can disconnect mine. I also need to add one of those kill switches that a few of you have done :thumbup:

Yep, that tracker dye is a saint and the devil rolled up into one. My hands were blue for about 3 days following application. No matter how hard you try it still ends up somewhere.
 
#351 ·
I sprayed Prodiamine today with the dead man's switch installed and it is 20 times more functional than with the stock switch. If you made only one modification, this is the one you should do!!!

Of course, I added a few more modifications:


The support legs offer no protection from concrete. Every time I placed the Chapin on my sloped driveway, it ended up moving or sliding. You could literally hear the paint being removed. When I checked, the bottom of the support leg was bare steel.


I want this thing to last a long time without rusting. So, I added seven inches of a disposal hose with an inside dimension of 7/8" to both legs. (Lube the leg and the inside of the hose on both ends with dish soap to get the hose to slide on the leg with some effort.)


As someone already mentioned in a previous post, I added some wing nuts to break the handle down for storage.

I have one more modification that I am doing tomorrow and then I am finished!